
 Pan
dd37f247f8
chore: use Runtime-only
Pan
dd37f247f8
chore: use Runtime-only
|
8 rokov pred | |
|---|---|---|
| build | 8 rokov pred | |
| config | 8 rokov pred | |
| src | 8 rokov pred | |
| static | 9 rokov pred | |
| .babelrc | 8 rokov pred | |
| .editorconfig | 9 rokov pred | |
| .eslintignore | 9 rokov pred | |
| .eslintrc.js | 8 rokov pred | |
| .gitignore | 8 rokov pred | |
| .postcssrc.js | 8 rokov pred | |
| .travis.yml | 8 rokov pred | |
| LICENSE | 8 rokov pred | |
| README-zh.md | 8 rokov pred | |
| README.md | 8 rokov pred | |
| favicon.ico | 8 rokov pred | |
| index.html | 8 rokov pred | |
| package.json | 8 rokov pred |
README-zh.md
vueAdmin-template
这是一个 极简的vue admin 管理后台 它只包含了 Element UI & axios & iconfont & permission control & lint,这些搭建后台必要的东西。
Extra
如果你想要根据用户角色来动态生成侧边栏和router,你可以使用改分支permission-control ## 相关项目 vue-element-admin
写了一个系列的教程配套文章,如何从零构建后一个完整的后台项目:
- 手摸手,带你用 vue 撸后台 系列一(基础篇)
- 手摸手,带你用 vue 撸后台 系列二(登录权限篇)
- 手摸手,带你用 vue 撸后台 系列三 (实战篇)
- 手摸手,带你用vue撸后台 系列四(vueAdmin 一个极简的后台基础模板,专门针对本项目的文章,算作是一篇文档)
- 手摸手,带你封装一个vue component
Build Setup
# Clone project
git clone https://github.com/PanJiaChen/vueAdmin-template.git

# Install dependencies
npm install

# 建议不要用cnpm  安装有各种诡异的bug 可以通过如下操作解决npm速度慢的问题
npm install --registry=https://registry.npm.taobao.org

# serve with hot reload at localhost:9528
npm run dev

# build for production with minification
npm run build

# build for production and view the bundle analyzer report
npm run build --report
Demo

Element-Ui 使用cdn教程
首先找到 index.html (根目录下)
引入 Element的css和js ,并且引入 vue 。因为 Element-Ui 是依赖 vue 的,所以必须在它之前引入 vue 。
之后找到 webpack.base.conf.js 加入 externals 让webpack 不打包 vue 和 element
externals: {
  vue: 'Vue',
  'element-ui':'ELEMENT'
}
之后还有一个小细节是如果你用了全局对象方式引入vue,就不需要 手动 Vue.use(Vuex) ,它会自动挂载,具体见 issue
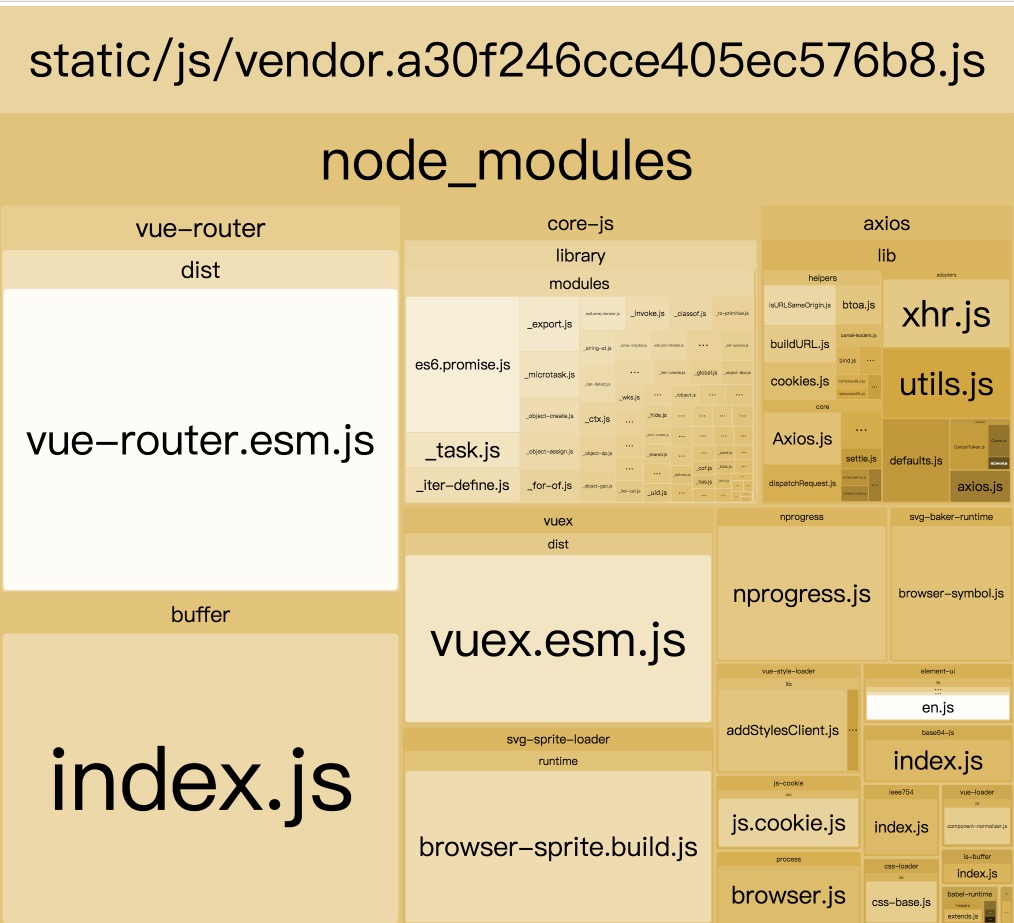
最终你可以使用 npm run build --report 查看效果
如图:
License
MIT license.
Copyright (c) 2017-present PanJiaChen